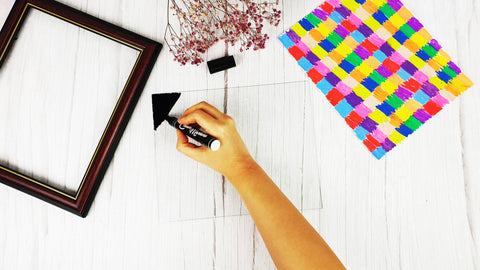
If you're into letterings, drawings, and rainbows, then this art idea is perfect for you. It's a fun and creative activity that makes an awesome and one-of-a-kind artwork–and something you can keep around as decor if you wish!
Materials needed:
- Chalkola Chalk Markers (6 warm colors, 6 cool colors, 1 black marker)
- Sheet of paper
- Glass picture frame
- A mild scraper (ex. cotton swab)
- Ruler
- Pencil
Step 1
Using a ruler, create diagonal lines (1 inch apart) across the paper as a guide

Step 2
Starting with your warm colors of choice, scribble horizontally using the diagonal columns as a guide
(Note: Overlap the colors so there won't be white spaces in between)

Step 3
After the 6 warm colors, continue adding the 6 cool colors downward

Step 4
For the column beside your finished one, start with cool colors then change to warm ones halfway through downward (the goal is to alternate the colors beside each column)

Step 5
For the next column, use warm colors first then cool ones downward

Step 6
Keep alternating your colors until you fill the whole sheet of paper

Step 7
Now color the entire glass frame with your black marker pen


Step 8
Once the ink dries on your glass frame, mount it together with your paper filled with colors onto the frame, and secure the back so the paper stays in place

Step 9
Using your scraper of choice, scrape off the black ink to write or draw, which will reveal the vibrant rainbow beneath! (Make sure to apply enough pressure on the scraper to completely remove the ink from the surface)

Ta-da! Say hello to your rainbow artwork!
This unique method of creating art is fun and relaxing at the same time. Once you’re done, you’ll have something personally made to admire and decorate your home with! If you're looking to make chalk marker art that's permanent, start by knowing the ideal surfaces to work on, which you can find here! Better yet, check out the helpful video below so you'd know where your chalk markers work best on!


